Clash detection is one of the most critical steps teams can take to identify and mitigate potential design conflicts before breaking ground, thus preempting construction issues and rework.
Clash detection has been around for some time. And while you can technically carry out the process manually—i.e., by reviewing details in design drawings or using a light box overlay —the advent of BIM tools has made the process easier and more accurate.
That’s why BIM clash detection has now become the standard in commercial construction, and it’s implemented in a project’s earliest design and preconstruction stages.
In this guide, we’ll explore the ins and outs of BIM clash detection. We’ll shed light on the best practices and top tools you can use to avoid construction clashes and elevate overall project quality.

What is BIM clash detection?
BIM clash detection is a process that identifies and addresses conflicts among at least two construction models in a virtual environment. These conflicts, or “clashes,” arise when different design components, such as structural elements, HVAC systems, or electrical conduits, intersect or interfere with the buffer zone of another object.
Architects, MEP engineers, and structural engineers often independently create models during the design process. As such, when these separate models are aggregated into a single project model, there’s a risk that the individual components would inadvertently overlap or interfere with each other.
BIM clash detection highlights these clashes early in the preconstruction or design process, which helps prevent costly adjustments and delays during the construction phase.
BIM clash detection determines where design aspects may overlap and creates constructability issues so teams can resolve them before moving to the next stage.
What is automatic clash detection?
Automatic clash detection can be implemented in one of two ways. First, a more manual version of automatic clash detection is when a BIM expert sets up a series of tests using several conditions, and the process is repeated for every new version.
Another way of approaching automatic clash detection removes the initial setup process and the need for specialized expertise. This second method works by simply adding relevant models into a cloud-based file where they’ll be aggregated and clashed automatically. Since this method clashes everything together at once, BIM experts and non-BIM experts alike can then use filters and groupings to narrow in on items they’re interested in. The resulting benefit is an immediate clash result and accessibility to all team members, regardless of their level of expertise or role. This immediacy makes it possible to pick up clash information directly in the authoring tools. So once a design decision is made, architects and engineers can see the impact of the change in real-time.
What are the benefits of BIM clash detection?
Harnessing the power of BIM clash detection comes with several advantages that can revolutionize how your construction projects are managed. Consider the following.
Save time and money
Since clashes can be identified and resolved before work onsite gets started, project teams save time and money by staving off the costly impacts of wasted materials, labor, and reworking physical properties. Teams can confidently move forward into the construction phase instead of worrying about what a new setback tomorrow might bring.
Beyond this, BIM clash detection reduces the stress and logistical complications of last-minute changes, allowing the project team to focus on delivering positive project outcomes for their clients and their partners.
Outcomes like jobsite safety. By reducing the risk of unexpected issues, on-site incidents are mitigated, and project leaders can manage their teams with safety at the forefront.
Minimize risk and waste
In addition to mitigating budget and schedule overruns, clash detection can improve productivity through smarter scheduling, material waste reduction, and installation efficiency.
As project stakeholders eliminate potential issues early on, project managers have the insights they need to drive toward timely delivery and exceed client expectations.
BIM clash detection can also minimize material waste. It allows teams to be more precise with their project planning, so they can order and utilize materials more efficiently and eliminate waste.
Enhanced collaboration
Projects undoubtedly see better outcomes when teams work together seamlessly. BIM clash detection paves the way for enhanced collaboration between different disciplines (architecture, structural engineering, MEP, etc.).
When clashes are identified, all relevant parties must work together to resolve them, ultimately promoting better coordination across stakeholders.
Types of clashes
Optimizing BIM clash detection involves familiarizing yourself with the various clashes that can occur in a construction project. Let’s break them down below.
Hard clash
A hard clash occurs when two systems and components take up the same place or intersect.
For example, a structural beam might be positioned where an HVAC duct is intended to go, or a plumbing pipe might be designed to run through an electrical conduit. These are physical conflicts in the design that, if not corrected before construction, could lead to significant rework.
That said, hard clashes are the easiest to identify—though they’re incredibly costly if you miss them.
Soft clash
A soft clash (sometimes called a clearance clash) occurs when a building element or component has not been given enough space or buffer to operate effectively and safely. This might involve maintenance access, safety clearances, or operational spaces.
One example could be if the AC unit doesn’t have enough buffer space to be serviced by a professional. This could hinder routine maintenance and lead to extended downtimes, affecting the building’s comfort and efficiency.
Similarly, safety issues like a high-voltage wire being too close to a plumbing line could constitute a soft clash. Any leakage from the pipe could lead to an electrical short circuit or, worse, pose an electrocution risk to maintenance personnel.
While soft clashes don’t involve physical overlaps, they still pose significant challenges that could compromise the building’s safety, functionality, and maintainability. Fortunately, these issues are flagged early on with the right BIM clash detection tools, so you can resolve them before hitting the jobsite.
Workflow clash
A workflow clash, known as a 4D clash, involves a scheduling conflict or project management misalignment. For instance, if the installation of electrical conduits is scheduled at the same time as pouring a concrete slab in the same area, it could result in work stoppage, rework, and delays.
Or, if large equipment is delivered to the site before the area is ready for installation, it could lead to space constraints or damage to the equipment.
Workflow clashes can hinder jobsite productivity when they’re not caught on time. As such, identifying and addressing them through BIM paves the way for optimal scheduling and sequencing.
How BIM clash detection is evolving
While BIM clash detection has undoubtedly been a game changer for construction pros, there’s still room for improvement, particularly regarding clash management.
Today, BIM managers do a lot of pre-coordination meeting work, getting the whole project team to discuss and resolve issues. However, many of these meetings often focus on low-impact matters—e.g., fixing simple clashes and double-checking that previous issues were resolved.
And while this level of granularity is necessary, teams need to develop a hybrid approach to clash management—one that involves continuous model coordination between engineers, architects, and trades.
Accomplishing this requires a shift in mindset and practices. It means getting the entire team involved in clash detection and ensuring they collaborate throughout the week to find, prevent and fix design conflicts and misalignment.
When issues are resolved on an ongoing basis, meetings can focus on high-priority issues, freeing BIM managers to devote their expertise to resolving more significant challenges. This optimizes everyone’s time and encourages a more proactive, collaborative, and efficient approach to BIM clash management.
All to say that a streamlined approach to clash management allows you to uncover the full potential of BIM technology, so you and your teams can further drive project success.
Top clash detection software
Speaking of streamlining BIM clash management, the best way to unlock efficiencies in your processes is to leverage clash detection software—ideally, one that’s cloud-based.
The right tools automate repetitive tasks, reduce the set-up time to near zero, and work with the tools people use daily. That way, teams can spend less time manually searching for conflicts and devote more energy to resolving clashes.
To that end, here’s a look at the top clash detection software for your construction projects.
Navisworks
Navisworks is one of the most powerful tools in the market for coordinating construction projects. With its advanced clash detection capabilities and quantification tools, Navisworks helps users ensure that models are ready for construction.
On the scheduling and budgeting side, Navisworks’ 4D and 5D simulation lets you animate and interact with objects and create schedules directly from models. You can also import schedules and cost items from third-party project management applications to ensure the smooth coordination of all project components.
Beyond just detecting clashes, it also allows teams to validate and collaborate on proposed resolutions in a shared environment.
Autodesk BIM Collaborate
Coordinate teams and models from one place using Autodesk BIM Collaborate. The software enables project members to upload models, detect clashes, and resolve issues in real time. Enjoy unlimited projects and file storage, and rest easy knowing that all your info is secure and accessible.
And with mobile-friendly tools, stakeholders can view models from anywhere, so decisions can be made sooner rather than later.
Navisworks + Autodesk BIM Collaborate = a match made in construction heaven
Navisworks and Autodesk BIM Collaborate are powerful tools that work even better when used together.
Combined, these solutions massively benefit multiple teams and stakeholders throughout the project lifecycle.
Let’s start with BIM Managers. BIM Managers can use the Navisworks Coordination Issue Add-In to monitor the status, responsibility, and resolution of every issue across multiple projects. And since files are saved in the cloud, users in Navisworks can work on those files simultaneously, fostering real-time collaboration and promoting a seamless workflow from clash detection to resolution.
On the VDC side, teams can decide where to carry out clash detection for a specific project or phase.
Autodesk BIM Collaborate also lets users deactivate clash detection in certain coordination spaces. This feature offers rapid access to complex files in Navisworks while ensuring stakeholders can use essential workflows like Issue Management and Model Aggregation online.
Moreover, BIM Managers can create custom views in Autodesk BIM Collaborate, which means they can develop views for individual objects, disciplines, categories, or types from multiple models. This gives VDC teams more control over project information, so they can deliver only the most critical construction data to stakeholders in the field and across other companies.
In Autodesk BIM Collaborate and Navisworks, clashes can be organized into groups, enabling users to quickly review and generate batch issues from these grouped clashes. These groups serve as templates for clashes that share similar attributes, empowering users to address multiple errors simultaneously.
And the best part? All of these things take place on the Autodesk platform. In addition to offering a single source of truth, project stakeholders can work collaboratively in a shared environment, facilitating seamless communication, improved coordination, and streamlined decision-making throughout the project lifecycle.
Experience the future of BIM clash detection
BIM clash detection is vital in modern construction, enabling project teams to identify and resolve design conflicts before construction begins.
And by leveraging BIM clash detection tools like Navisworks and Autodesk BIM Collaborate, construction professionals can streamline the clash detection process, saving time, reducing costs, and increasing the project’s overall quality.
Robotech CAD Solutions can help you find the best software to fit your needs. For over 30 years, we have been an Autodesk Reseller, implementing Autodesk Solutions. Contact us to learn more.


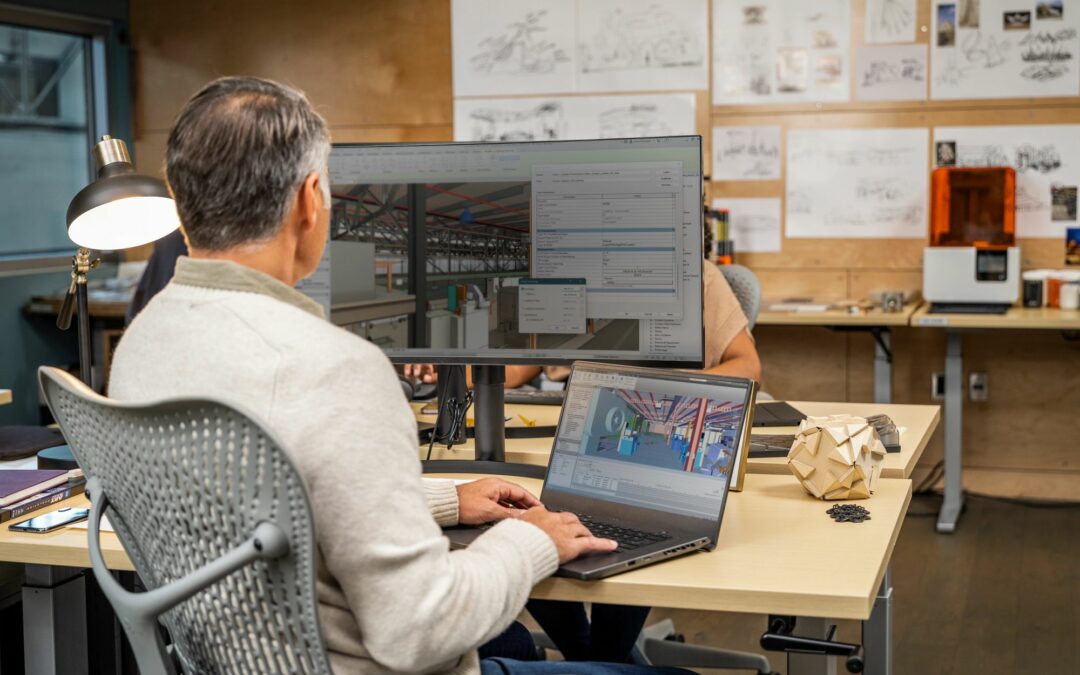
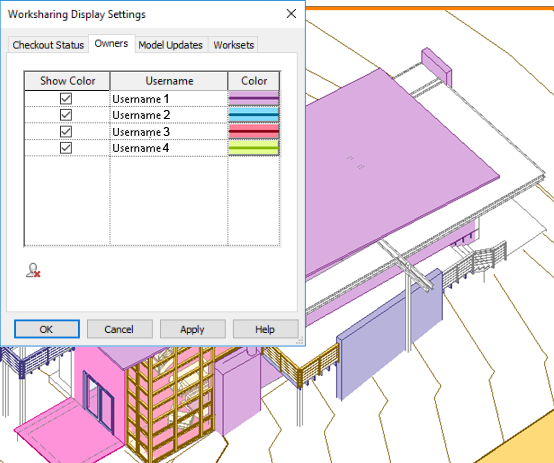 Credit: Autodesk | Visually distinguish team members that own elements in a workshared project.