Changes to Autodesk’s 2025 Pricing

Changes to Autodesk’s 2025 Pricing

To help you plan ahead, we want to share important Autodesk price and policy changes taking effect in May 2025.

1. Price Increase & Policy Change for M2S & TNU Subscriptions

  • Effective May 7, 2025: Autodesk will increase renewal prices for Move to Subscription (M2S) and Transition to Named User (TNU) subscriptions by 5% globally (consistent with their 10-year commitment).
  • Effective May 10, 2025: These discounted subscriptions will only be available for annual renewal. Multi-year subscriptions will automatically convert to discounted annual terms.

✅ Recommended Action: Renew or extend your M2S or TNU subscriptions before May and consider switching to a 3-year term to lock in current rates.

2. General Autodesk Subscription Price Increase

  • Effective May 7, 2025: Autodesk will implement an approximate 3.3% price increase for most new and renewing single-user subscriptions (annual and multi-year).
  • Some products may see higher increases, particularly those previously subject to discounted or exception pricing.

✅ Recommended Action: Renew, extend, or purchase new subscriptions before May, and consider a 3-year term to maximize savings.

If you have any questions or need assistance reviewing your Autodesk subscription options, we’re here to help!

Take Action Today

Contact our team now to learn more by replying to this email or by calling 201-792-6300 to talk with your account manager, or email the sales team at [email protected].

Why Choose Robotech CAD Solutions Resources?

By purchasing directly from us, you gain access to:

  • Personalized renewal support.
  • Expert license management and assistance tailored to your needs.
  • Industry-leading guidance for your digitization journey.
FAQs
  • Why is Autodesk making these changes?
    The adjustments align Autodesk’s pricing globally and streamline renewal policies across regions.
  • Are there exceptions?
    Yes, certain globally priced subscriptions (Premium, Flex) and Enterprise Business Agreements are unaffected.
  • Can I still get discounts?
    Yes, 3-year subscription renewals will retain the 5% discount, and EMS subscriptions in select markets will also receive specific discounts.
AI, Smart Building Automation, and Advanced Technologies: Transforming Facilities Management in 2025

AI, Smart Building Automation, and Advanced Technologies: Transforming Facilities Management in 2025

The facilities management industry is on the brink of a technological revolution. By 2025, advancements in artificial intelligence (AI), smart building automation, and other cutting-edge technologies are expected to redefine how buildings are managed, maintained, and optimized. These innovations promise to drive unprecedented levels of efficiency, enable predictive maintenance, and enhance operational decision-making. As the world becomes increasingly connected, facilities managers are poised to leverage these tools to create smarter, more sustainable, and cost-effective environments.

The Rise of AI in Facilities Management
AI is set to become a cornerstone of facilities management by 2025. Machine learning algorithms can analyze vast amounts of data from building systems, such as HVAC, lighting, and security, to identify patterns and optimize performance. For example, AI can predict equipment failures before they occur, reducing downtime and repair costs. Additionally, AI-powered energy management systems can dynamically adjust energy usage based on occupancy, weather conditions, and other factors, leading to significant cost savings and reduced environmental impact.

Smart Building Automation: A Game-Changer
Smart building automation systems are transforming how facilities operate. These systems integrate IoT (Internet of Things) sensors, connected devices, and centralized control platforms to monitor and manage building operations in real time. By 2025, smart automation will enable facilities managers to remotely control lighting, temperature, and security systems, ensuring optimal conditions while minimizing energy waste. Moreover, these systems can provide actionable insights through data analytics, helping managers make informed decisions to improve efficiency and occupant comfort.

Predictive Maintenance: Reducing Costs and Downtime
One of the most significant benefits of advanced technologies in facilities management is the shift from reactive to predictive maintenance. IoT sensors and AI algorithms can monitor equipment health and performance, detecting anomalies that indicate potential failures. This proactive approach allows maintenance teams to address issues before they escalate, reducing costly downtime and extending the lifespan of assets. By 2025, predictive maintenance is expected to become the industry standard, saving organizations millions in repair and replacement costs.

Enhanced Operational Decision-Making
The integration of AI and data analytics is empowering facilities managers to make smarter, data-driven decisions. Advanced technologies provide real-time insights into building performance, energy usage, and occupant behavior, enabling managers to identify inefficiencies and implement targeted improvements. For instance, analytics platforms can highlight underutilized spaces, allowing organizations to optimize floor plans and reduce overhead costs. By 2025, these tools will be indispensable for facilities managers seeking to maximize operational efficiency.

Sustainability and Energy Efficiency
As global concerns about climate change grow, sustainability is becoming a top priority for facilities management. Smart technologies are playing a crucial role in helping organizations reduce their carbon footprint. AI-driven energy management systems, for example, can optimize energy consumption by adjusting heating, cooling, and lighting based on real-time data. Additionally, renewable energy sources, such as solar panels and wind turbines, can be integrated into smart building systems to further enhance sustainability. By 2025, these innovations will be key to achieving net-zero energy goals.

Challenges and Considerations
While the potential benefits of AI and smart building automation are immense, there are challenges to consider. Implementing these technologies requires significant upfront investment, and organizations must ensure they have the necessary infrastructure and expertise to support them. Data privacy and cybersecurity are also critical concerns, as connected systems are vulnerable to hacking and other threats. Facilities managers must work closely with IT teams to address these risks and ensure the secure deployment of advanced technologies.

The Future of Facilities Management
By 2025, the facilities management landscape will be unrecognizable from what it is today. AI, smart building automation, and other advanced technologies will drive a new era of efficiency, sustainability, and innovation. Facilities managers who embrace these tools will be better equipped to meet the evolving demands of their organizations and occupants. As the industry continues to evolve, staying ahead of technological trends will be essential for success.

The integration of AI, smart building automation, and advanced technologies is set to revolutionize facilities management by 2025. These innovations will enable predictive maintenance, enhance operational decision-making, and promote sustainability, ultimately transforming how buildings are managed and maintained. While challenges remain, the potential benefits far outweigh the risks, making this an exciting time for the industry. Facilities managers who invest in these technologies today will be well-positioned to lead the way in the smart buildings of tomorrow.

Want to learn more about Facilities Management applications or how the leading tool, Archibus, can benefit you in this ever changing landscape?

AutoCAD Tutorial: Advanced Layer Management Techniques

AutoCAD Tutorial: Advanced Layer Management Techniques

Welcome to our tutorial on advanced layer management techniques in AutoCAD! Whether you’re a seasoned professional or a beginner looking to improve your drafting efficiency, mastering layer management can significantly enhance your workflow. In this guide, we’ll explore layer filters, layer states, and property overrides to help you organize your drawings like a pro.

Why Advanced Layer Management Matters


In complex drawings, managing layers can become overwhelming. Advanced techniques like layer filters, layer states, and property overrides allow you to:

– Quickly isolate and work with specific layers.

– Save and restore layer configurations for different tasks.

– Temporarily override layer properties without altering the original settings.

Let’s dive into each of these techniques!

  1. Using Layer Filters

Layer filters help you organize and display only the layers you need at any given time. This is especially useful in drawings with dozens or hundreds of layers.


Steps to Create a Layer Filter:

  1. Open the Layer Properties Manager:

– Type `LA` in the command line and press Enter.

– Alternatively, find it in the Home tab under the Layers panel.

  1. Create a New Filter:

– In the Layer Properties Manager, click the New Property Filter button (funnel icon).

– Name your filter (e.g., “Electrical Layers”).

  1. Set Filter Criteria:

– Use the filter dialog to specify criteria like Layer Name, Color, or Line Type.

– For example, filter layers with names containing “ELEC” for electrical components.

  1. Apply the Filter:

– Once created, the filter will display only the layers that match your criteria.

– You can toggle the filter on or off as needed.


![Layer Filter Example](image-link-here)

*Example: A layer filter isolating electrical layers.*

  1. Saving and Restoring Layer States


Layer states allow you to save the current visibility, color, line type, and other properties of layers. You can restore these states later, making it easy to switch between different views or configurations.


Steps to Save a Layer State:

  1. Configure Your Layers:

– Adjust layer properties (e.g., turn off layers, change colors) to your desired setup.

  1. Open the Layer States Manager:

– Type `LAYERSTATE` in the command line and press Enter.

– Alternatively, find it in the Home tab under the Layers panel.

  1. Create a New Layer State:

– Click New and give your state a name (e.g., “Floor Plan View”).

– Choose which properties to save (e.g., On/Off, Color, Line Type).

  1. Restore a Layer State:

– To restore a saved state, open the Layer States Manager, select the state, and click Restore.


![Layer States Example](image-link-here)

*Example: Saving and restoring a layer state for a floor plan view.*

  1. Using Property Overrides

Property overrides allow you to temporarily change the appearance of layers in specific viewports without altering the original layer properties. This is particularly useful for creating presentation drawings.


Steps to Apply Property Overrides:

  1. Switch to a Layout Tab:

– Click on a layout tab to access paper space.

  1. Enter a Viewport:

– Double-click inside a viewport to enter model space.

  1. Open the Layer Properties Manager:

– Type `LA` and press Enter.

  1. Override Layer Properties:

– In the Layer Properties Manager, look for the “VP” columns (Viewport Overrides).

– Click on a property (e.g., Color, Line Type) to override it for the current viewport.

  1. Exit the Viewport:

– Double-click outside the viewport to return to paper space.

![Property Overrides Example](image-link-here)

*Example: Overriding layer colors in a viewport for a presentation drawing.*

Tips for Effective Layer Management

Use Descriptive Layer Names: Avoid generic names like “Layer1.” Instead, use names like “Walls,” “Doors,” or “Electrical.”

Group Related Layers: Use layer filters or prefixes to group similar layers (e.g., “A-Walls,” “A-Doors” for architectural layers).

Save Multiple Layer States: Create layer states for different tasks, such as “Editing,” “Printing,” or “Presentation.”

Leverage Templates: Save your layer setups in a template file (`DWT`) to reuse them in future projects.

Conclusion

By mastering advanced layer management techniques in AutoCAD, you can streamline your workflow, reduce errors, and create more organized drawings. Whether you’re using layer filters to isolate specific elements, saving layer states for quick configuration changes, or applying property overrides for presentations, these tools will help you work smarter, not harder.

Feel free to experiment with these techniques and incorporate them into your daily workflow. Happy drafting!


Revit Tutorial: Using View Range Settings in Revit to Control Visibility in Floor Plan Views

Revit Tutorial: Using View Range Settings in Revit to Control Visibility in Floor Plan Views

Welcome to this beginner-friendly tutorial on using View Range settings in Autodesk Revit! View Range is a powerful tool that allows you to control which elements are visible in your floor plan views. By the end of this tutorial, you’ll understand how to adjust these settings to display exactly what you need in your drawings.

What is View Range?

In Revit, the View Range determines how much of the model is visible in a floor plan view. It defines the vertical range (height) of the view and controls which elements are cut, visible, or hidden. Think of it as a “slice” through your building model at a specific height.

Key Components of View Range

The View Range settings consist of four primary planes:

  1. Primary Range

Top: Defines the upper limit of the view.

Cut Plane: Defines the height at which elements are “cut” (e.g., walls, doors, windows).

Bottom: Defines the lower limit of the view.

  1. View Depth: Extends below the Bottom plane to show additional elements (e.g., foundations or floor slabs).

Step-by-Step Guide to Adjusting View Range


Step 1: Open a Floor Plan View

  1. Open your Revit project.
  2. Navigate to the floor plan view you want to adjust.

Step 2: Access View Range Settings

  1. In the Properties palette, scroll down to the Extents section.
  2. Click on View Range to open the View Range dialog box.

Step 3: Understand the View Range Dialog Box

The dialog box will display the following fields:

Top: Set this to the highest level you want to see in the view (e.g., the level above).

Cut Plane: Set this to the height where elements are cut (typically 4 feet for floor plans).

Bottom: Set this to the lowest level you want to see in the view (e.g., the current level).

View Depth: Set this to extend below the Bottom plane if you want to see additional elements.

Step 4: Adjust the Settings

  1. Set the Cut Plane: For most floor plans, set the Cut Plane to 4 feet (1200 mm) to cut through doors and windows.
  2. Adjust the Top and Bottom: Set the Top to the level above and the Bottom to the current level.
  3. Extend the View Depth: If you want to see elements below the floor (e.g., foundations), set the View Depth below the Bottom plane.

Step 5: Apply and Check the Results

  1. Click OK to apply the settings.
  2. Review your floor plan to ensure the desired elements are visible.

Tips for Beginners 

Experiment: Don’t be afraid to adjust the settings and see how they affect your view.

Use Defaults: Start with the default settings and tweak them as needed.

Check Visibility Graphics: If elements are still not visible, ensure they are not hidden in the Visibility/Graphics settings.

Visual Aid

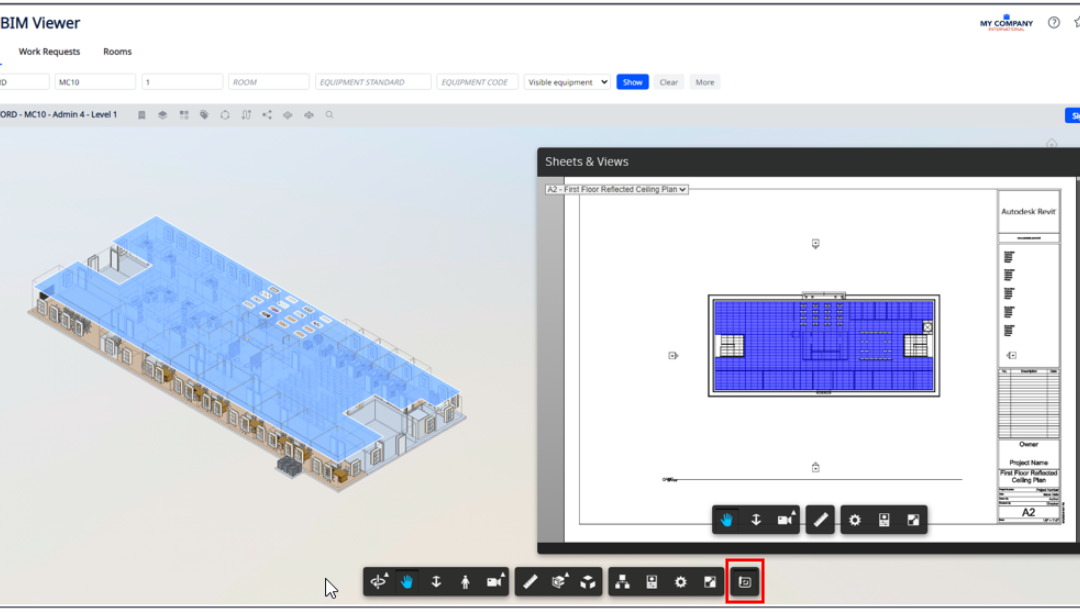
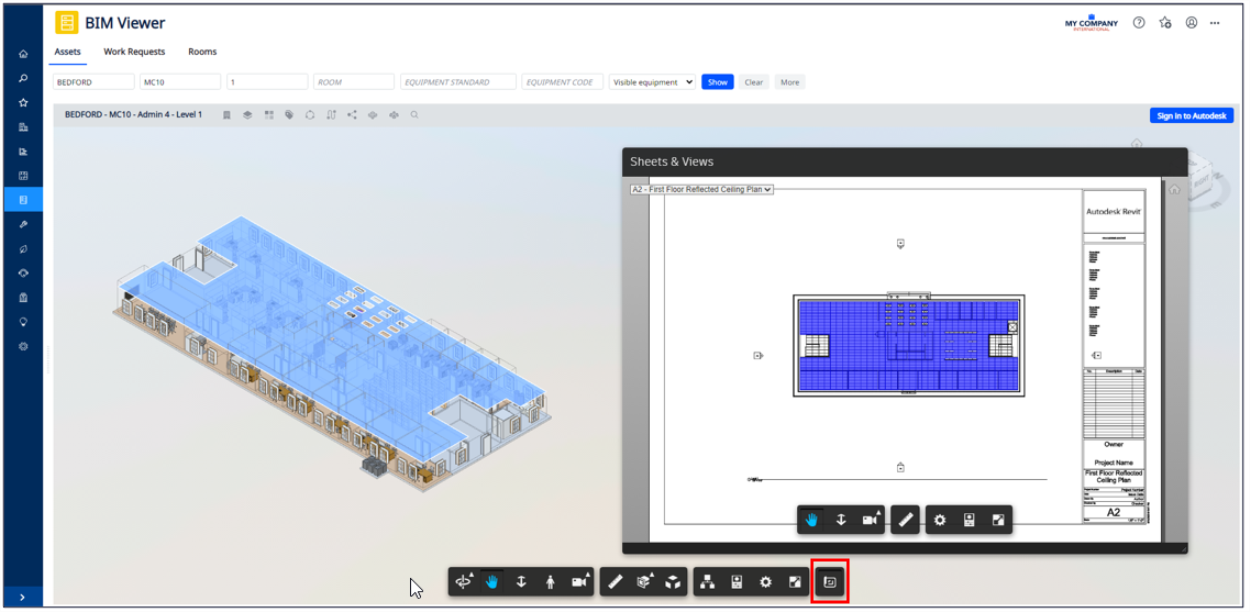
The images below are an example of how the View Range dialog box looks and how it affects a floor plan view: 

Conclusion 

Mastering the View Range settings in Revit is essential for creating accurate and clear floor plan views. By following this tutorial, you should now feel confident in adjusting these settings to control the visibility of elements in your projects.

Happy modeling!

If you have any questions about Revit or access the View Range, feel free to leave a comment down below and one of our instructors can reach out.

Overcoming Hurdles in BIM Adoption: Practical Solutions for Firms

Overcoming Hurdles in BIM Adoption: Practical Solutions for Firms

Building Information Modeling (BIM) has revolutionized the architecture, engineering, and construction (AEC) industry by enabling more efficient project management, improved collaboration, and enhanced visualization. However, despite its proven benefits, many firms face significant hurdles when attempting to adopt BIM effectively. These challenges range from high initial costs and resistance to change, to a lack of skilled personnel and interoperability issues. Fortunately, there are practical solutions that can help firms navigate these obstacles and fully leverage the potential of BIM.


One of the most common barriers to BIM adoption is the high upfront cost. Implementing BIM requires investment in software, hardware, and training, which can be daunting for smaller firms or those with limited budgets. To address this, firms can consider phased implementation. Instead of adopting BIM across all projects simultaneously, they can start with pilot projects to demonstrate ROI and build confidence in the technology. Additionally, firms can explore subscription-based software models, which reduce initial costs and provide access to regular updates and support. According to GeoWeek News, this approach allows firms to gradually scale their BIM capabilities without overwhelming their financial resources.

Another significant challenge is resistance to change, particularly from employees accustomed to traditional methods. Change management is critical in overcoming this hurdle. Firms should focus on clear communication about the benefits of BIM, such as improved efficiency, reduced errors, and enhanced collaboration. Providing comprehensive training programs and involving employees in the transition process can also foster buy-in. As highlighted by TaalTech, creating a culture of innovation and continuous learning is essential for successful BIM adoption. Leadership must champion the change and demonstrate a commitment to supporting staff throughout the transition.

A lack of skilled personnel is another obstacle that can impede BIM adoption. BIM requires specialized knowledge and expertise, which may not be readily available within a firm. To address this, firms can invest in training programs to upskill existing employees. Partnering with educational institutions or industry organizations can also help bridge the skills gap. Additionally, hiring experienced BIM professionals or consultants can provide the necessary expertise to guide the implementation process.

Interoperability issues between different software platforms can also hinder BIM adoption. Incompatible file formats and data exchange problems can disrupt workflows and reduce efficiency. To overcome this, firms should prioritize the use of open standards, such as Industry Foundation Classes (IFC), which facilitate seamless data exchange between different software applications. Additionally, investing in software solutions that offer robust interoperability features can help streamline collaboration across teams and disciplines.

Another practical solution is to establish clear BIM standards and protocols. Without standardized processes, firms risk inconsistent implementation and miscommunication. Developing a BIM execution plan (BEP) can help define roles, responsibilities, and workflows, ensuring that all stakeholders are aligned. This plan should outline the level of detail required at each project stage, as well as the specific deliverables. By setting clear expectations and guidelines, firms can minimize confusion and maximize the benefits of BIM.

Finally, firms should leverage the power of collaboration and partnerships. BIM adoption is not just about technology; it’s about fostering a collaborative environment where all stakeholders work together toward a common goal. Engaging with clients, contractors, and suppliers early in the project can help align expectations and ensure that everyone is on the same page. Cloud-based BIM platforms can further enhance collaboration by enabling real-time access to project data and facilitating communication across teams.


Adopting Revit Within Architectural Firms

When it comes to adopting BIM within architectural firms, Autodesk Revit is often the software of choice due to its robust features and widespread use in the industry. However, the challenges of BIM adoption—such as high costs, resistance to change, and a lack of skilled personnel—are equally applicable to Revit implementation. To successfully integrate Revit into their workflows, architectural firms can apply the same practical solutions discussed earlier. Starting with pilot projects, investing in training, and fostering a culture of collaboration can help firms overcome these hurdles and fully realize the benefits of Revit. By addressing these challenges head-on, architectural firms can position themselves for long-term success in an increasingly digital and competitive industry.